SellerApp Automation Rules – Overview
Tired of spending hours tweaking bids? Let SellerApp’s automation rules take over your Amazon PPC management. By taking advantage of SellerApp’s automation rules or predefined rule templates you can effectively optimize your campaign management and manage your advertising efficiently without much human intervention.
How Does Amazon Automation Work?
SellerApp’s automation rules are essentially pre-defined actions that trigger when certain conditions are met within your campaigns. SellerApp Ad Optimization Rules help you boost performance by automatically adjusting bids, adding new keywords, eliminating wasted spend, and much more. Fundamentally, SellerApp provides you with a complete Amazon Ads Automation Rules setup to drive better outcomes with minimal effort.
How to Set Up an Automation Rule in SellerApp’s Advertising Automation Tool
If you’re looking to automate your ad campaigns, follow these simple steps to set up an automation rule using SellerApp’s advertising automation tool:
Access the Automation Feature

- Navigate to the “Automation” tab on your SellerApp dashboard.
- Select “Create New Rule.”
- Choose from existing templates or create a custom rule tailored to your needs.
Assign a Descriptive Name
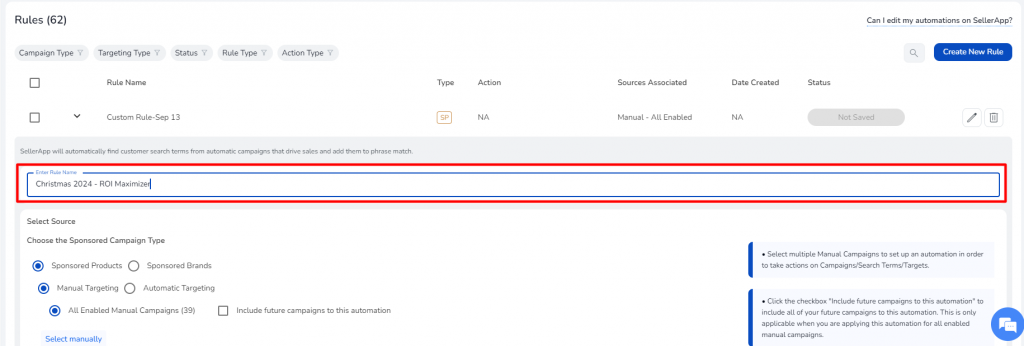
- Give your rule a clear, descriptive name, such as “Black Friday ACoS Reducer” or “Christmas 2024 – ROI Maximizer.”
- This ensures easy tracking and monitoring through the “History” feature.
Select Your Campaign and Targeting Types
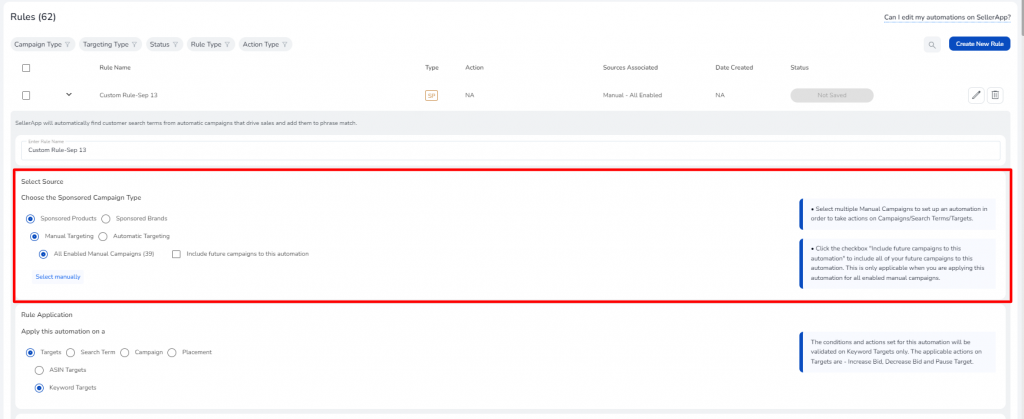
- Choose the appropriate campaign type: Sponsored Products or Sponsored Brands.
- For Sponsored Products, decide between Manual or Automatic Targeting.
Define Rule Applications
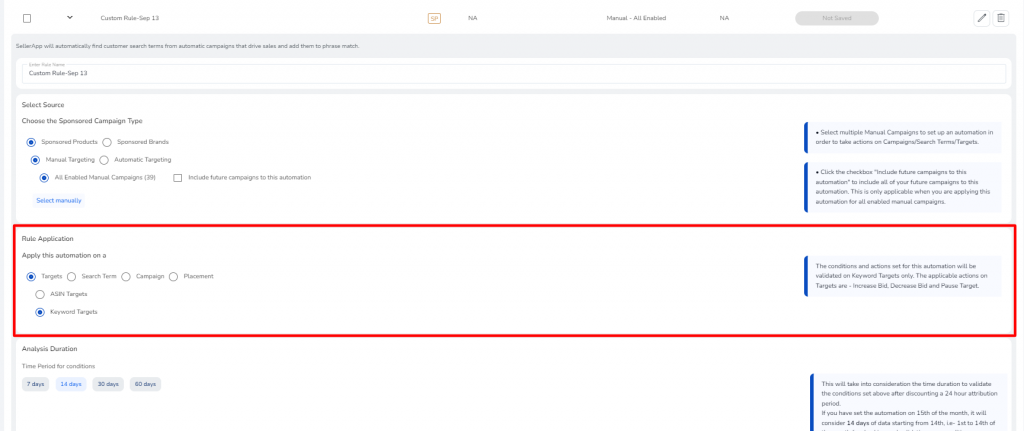
- Specify whether the rule applies to Search Terms, Targets (keywords or ASINs), or Placements.
- Set actions such as increase/decrease bids or pause low-performing targets.
Determine the Analysis Duration
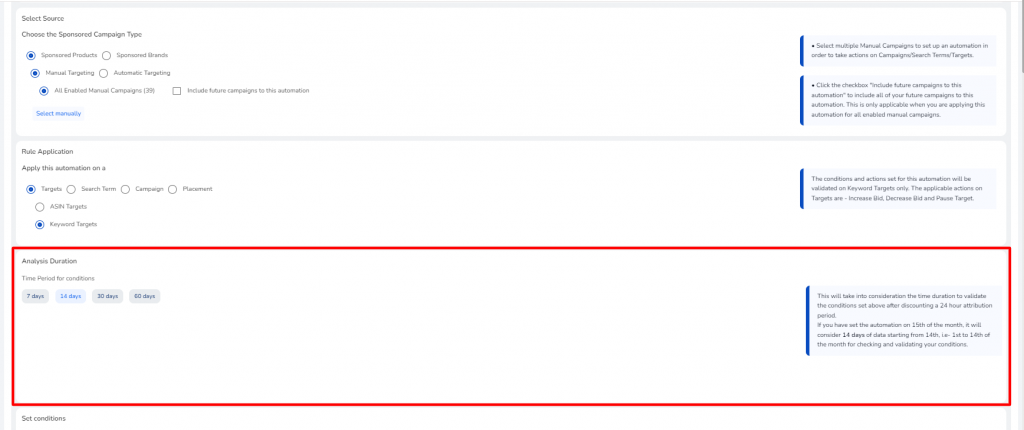
- Set the timeframe for data analysis to inform your rule: options include 7, 14, 21, 30, or 60 days.
Set Conditions for Automation
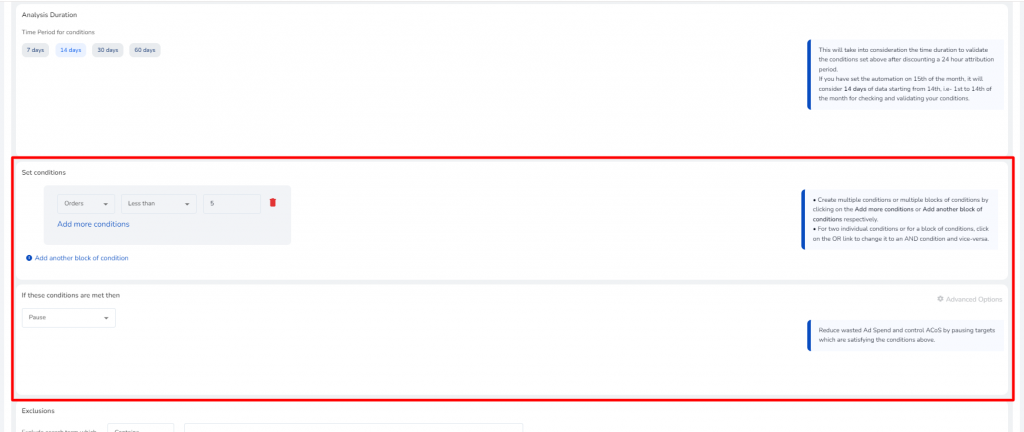
Define the conditions that will trigger the rule, such as:
- Bid adjustments
- Impressions
- Orders
- ACoS, etc.
Additionally, take advantage of “AND” or “OR” logic to combine multiple conditions for more complex automation.
Establish Exclusions
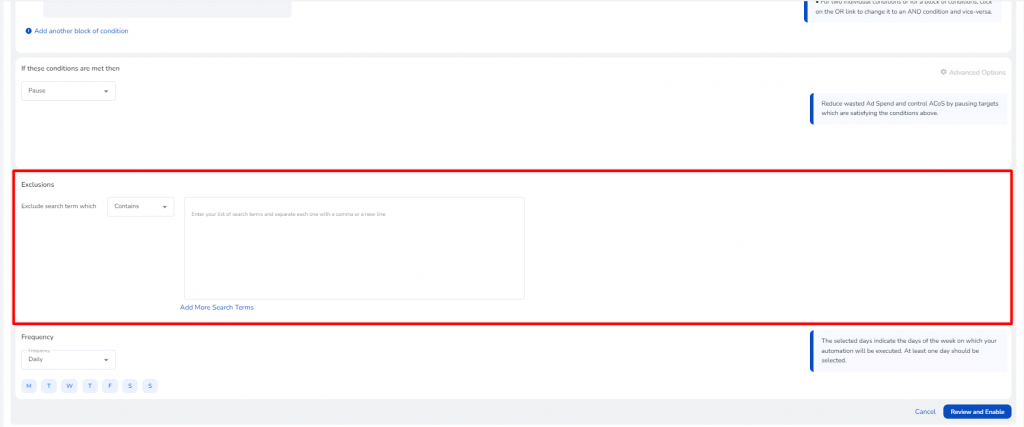
- Identify specific search terms or phrases to exclude from the rule’s actions, ensuring non-relevant or protected terms aren’t targeted.
Review and Activate
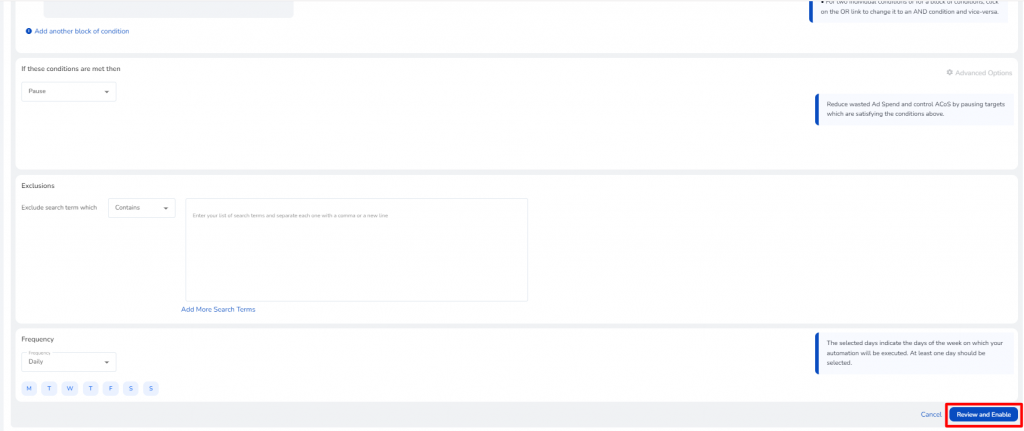
- Once you’ve set all the parameters, click “Review and Enable” to finalize and launch your automation rule.
SellerApp PPC Automation Rules
If you don’t have a specific strategy and need more of an outcome, SellerApp also offers a variety of rule templates for Amazon PPC. Each of these rule templates is designed to enhance your ad performance in different areas and drive your business forward. Whether you’re aiming to maximize ROI, boost impressions, reduce ACoS, or reduce ad spend through efficient budget utilization, there’s a rule in our library to address your needs. Most importantly, you can run them simultaneously depending on your goal.
Here are all the automation rules that are currently available on the SellerApp platform:
1) ROI Maximizer (2.7x RoAS)
- This rule increases bids on high-performing keywords or ASINs that typically generate a significant number of orders. It ensures that you get the most return for every dollar spent on your ads.
2) Keyword Picker (1.4x Clicks)
- This Amazon ads automation rule identifies profitable keywords from profitable search terms. It then adds these golden keywords to your campaigns to drive more clicks. It is a highly effective method to expand your keyword list, capture more potential buyers, and uncover new opportunities for engagement.
3) Target Harvester (2.9x Impressions)
- Increase your product’s visibility by generating new targets from search terms with a high impression share. This automated ad management rule ensures that you leverage high-traffic terms to capture more of the audience’s attention and, ultimately, maximize your reach in Amazon searches.
4) Wasted Click Eliminator (30% Spend Reduction)
- Remove search terms with low conversions that are wasting your ad budget. This rule is designed to create exceptions for efficiency and simultaneously to ensure that your brand search terms are still visible to shoppers on Amazon
5) ACoS Reducer (40% Reduction in ACoS)
- This rule helps reduce your ACoS by creating negative targets for underperforming keywords or targets. It’s perfect for anyone looking to cut costs by eliminating search terms that are not delivering any value.
6) Down Bid Optimizer (0.8x ACoS)
- Cut back on overspending by reducing bids on non-performing keywords and ASINs. This rule optimizes budget allocation by focusing ad spend on more effective targets.
7) Dayparting Rule (70% Click Reduction)
- Optimize ad spend allocation by analyzing performance data throughout the day. This rule helps identify low-conversion hours and adjusts ad spend accordingly to enhance overall efficiency.
8) Search Rank Booster (1.75x Organic Growth)
- Automatically increase or decrease bids based on your product’s organic search ranking. This is especially important for your hero ASINs. This SellerApp PPC automation rule will help maintain or improve your product’s position in Amazon search results (lost keyword ranking and visibility).
9) Inventory Refactoring (95% In-Stock Probability)
- Turn down ad visibility when inventory levels are low to prevent stockouts. This rule helps manage ad spend in line with available stock, ensuring products remain in stock and ads are effective.
Ultimately, SellerApp’s advanced ad automation rules offer an efficient method to manage your Amazon PPC Campaigns. Whether your goal is to reduce ACOS, maximize ROI, boost impressions, these rules can all help you achieve your desired outcomes with minimal manual effort. Start using these rules to skyrocket your business today! Of course, if you want assistance, you are always welcome to schedule a call with us!
Do you need more information on how PPC automation can help you? Check out our article on Amazon PPC Automation to understand in-depth information on how it can add value to your business.


