Start Selling on Amazon FBA with a Few Simple Steps
It is a well-known fact that Amazon is one of the largest e-commerce companies in the world. It has truly changed the way we shop online. But more than that, it has reshaped the way people do business on the internet.
Amazon has enabled thousands of people across the world to build a profitable, scalable business by allowing people to sell their products on Amazon Marketplace.
If you are here reading this article, then the chances are you want to start your own business or generate an additional income, or both!
First, congratulations on taking the first step – we are glad that you are thinking of doing something more with your time than just working at that 9-5 job.
Here is the good news – it is more than possible to build a profitable business on Amazon and for that very purpose, we have prepared a comprehensive guide on how to sell on Amazon.
However, to get that dreamy, seven-figure revenue, you will have to work hard and smart. So without further ado, let us get started.
Quick Guide:
- How to start selling on Amazon?
- Amazon product launch strategy
- Amazon FBA Competitor Analysis 101
- Expedite Your Research and Get Accurate Estimates
- Creating Seller Central Account
- How to list a new product on Amazon?
- UPC and FN SKU Barcodes
- Keyword Research For Optimized Product Listing
- Photography and Listing Copy
- Packaging Design
- Shipping Methods
- Seller Central Shipment Creation
- A Pro Tip – Get your Products Checked
- How To Get Sales?
How To Sell On Amazon For Beginners?
Well, we understand that it can be quite daunting for someone who is absolutely new to the idea of business to start his own venture on Amazon. To keep you inspired, here are some intriguing facts about Amazon:
- As of 2018, the Amazon e-commerce retail sales have crossed $250 billion and that is in the United States alone! This translated into a growth of 49% year-on-year.
- As of the first quarter of 2016, Amazon had more than 300 million active customers across the world. In all likelihood, this figure has increased significantly by 2018. It is also worth mentioning that as of 2018, there are closes to 100 million Amazon Prime customers.
- To make things more interesting, across all the Amazon marketplaces – USA, Germany, India, Italy, Japan, Spain, Mexico, Brazil, China, UK, France, and Canada, there are a little over 5 million sellers. Think about the massive, untapped potential that Amazon marketplace has to offer to its sellers.
- Sellers who are looking for additional working capital can take help of Amazon to avail a loan. That’s right, Amazon Lending is a program that allows Amazon sellers to apply for a business loan at highly competitive rates. However, it is an invite-only feature for the time being.
So, after reading these facts, are you feeling more excited about the prospect of starting an Amazon business? If so, then here is a five-step guide to go about selling on Amazon FBA.
Recommended read: How Does Amazon Inspire Work?

- Find a Product – Under the most optimal circumstance, it needs to be a product choice that is already selling and has very few competitors. In an ideal scenario, think along the lines of ‘low-cost high margin.’
- Source the Product – Once you have found the product, you will need to source it with the manufacturers. To get a better perspective on this, we recommend you contact 10-15 suppliers and order samples. Be sure to negotiate and find a supplier that suits your business requirements.
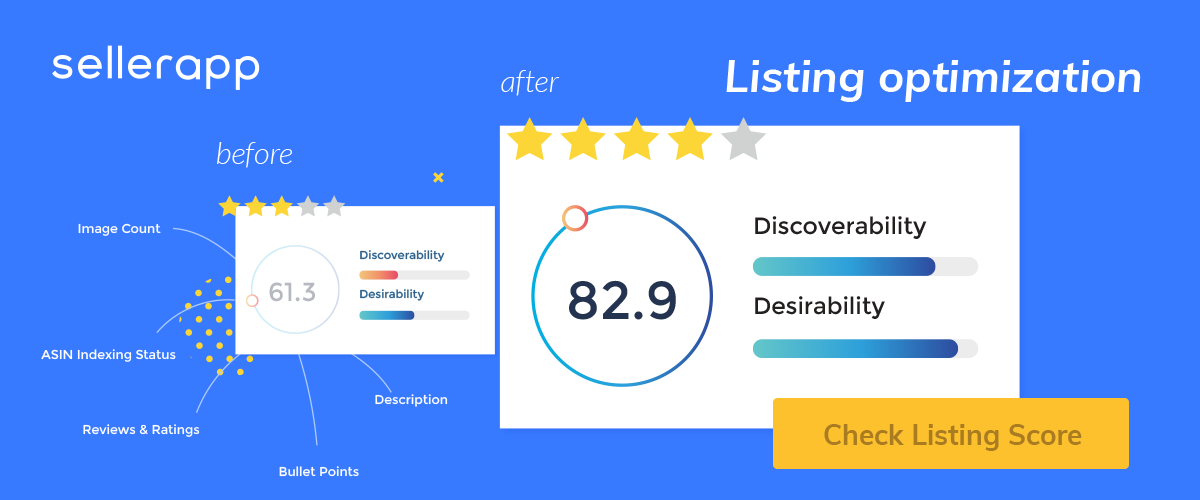
- Create the Product Listing – This is an important step. Since your listing is the only sales gateway for your Amazon sales, you will have to create the product listings that include using high-quality images, bulleted points optimized for the search engines, high-quality descriptions, et cetera. In simpler terms, a highly effective product listing is what makes the difference.
- Figure out your Delivery Plan – You can either use Amazon FBA or opt for a third-party logistics partner. If you choose Fulfillment by Amazon, it could sometimes have a huge impact on your margins. Yet it is the most preferred choice for more sellers. At the brighter side, you can capitalize Amazon’s infrastructure and logistics network to ship your products across the country and possibly, across the globe! On the other hand, if you choose to deliver the products yourself, you should be sure to run the numbers carefully and choose a reliable partner to not run into any issues later.
- Promote your product – At the end of the day, you are selling your products on Amazon whilst competing with thousands of other sellers. The only way to stand out is by creating ad campaigns and tracking the progress of the same on a regular basis.
A well-strategized product launch
We are going to look at the aforementioned steps in great detail below.
Step 1: Find a Product
Well, here is the deal-finding a product to sell on Amazon using FBA can be highly frustrating. After all, you have thousands of products to choose from and to narrow it down to a selected few is no easy feat. The best way to go about it is by making a list and working on it from there.
As a rule of thumb, the best way to go about it is by finding existing products that are selling well on the Amazon Marketplace.
That being said, you do not want to sell a product on Amazon just because it is popular or you like it.
To help you in this endeavor, we, at SellerApp, offer an array of free and paid tools. Using these tools, you will be able to realize your choice of products more easily.
So, how do you get started with this? Well, the answer is simple – you analyze the existing market for the product. That’s right, there is a certain level of philosophy involved here that talks about analyzing your competitor in order to get a better insight. This is how you do it:
Recommended read: FBA New Selection Program – Details and Benefits.
Amazon FBA Competitor Analysis 101
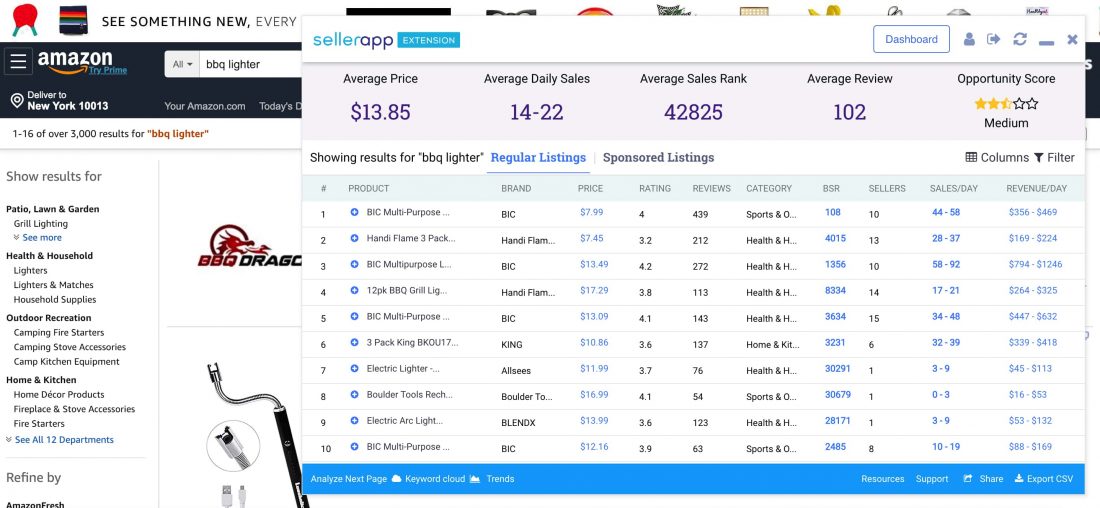
- First up, go on the Amazon site and search for the product that you are looking to sell. Then, you have to analyze the top 10 listings for that particular keyword based on reviews. Think about it for a second – one of the best ways to judge a product is through its reviews! The more reviews a product has, the more popular it is! So, you need to look at products which have less than 300 reviews.
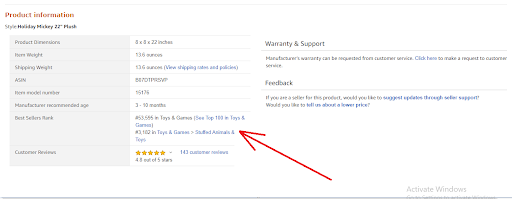
This is because it takes a long time (and money) to accumulate positive reviews on Amazon. So ideally, you need to compete with a listing that hasn’t got more than 100 reviews up front. - After you gathered the 10 product listings for your keyword, you will have to find the Amazon Best Sellers Rank for each individual product. This can be found easily in the product details section on the listing page. In case you are not aware, Amazon Best Sellers Rank is an indicator of how popular an item is in that sub-category. The lower the rank, the more popular a product is.
- Now, all you have to do is use SellerApp’s Free Amazon Sales Estimator Tool to figure out how many sales each individual product is making on average per day. Simply enter the Amazon Sellers Rank in the tool, and you will be shown the approximate number of sales it makes on a daily basis.
- As a combined total for all the 10 product listings, you should be looking at least 80-90 sales per day, which translates into approximately 2,400 – 2,700 sales per month. That is, for the individual product, you should be looking at least 8 sales per day, and you know what – this is a very realistic figure to aim for. Anything less than this implies that the sales are going to be low which, in turn, means that the product is not in demand.
- Another thing you want to consider here is to ensure that this monthly total sales figure is spread out evenly across all the products. That is, if you are looking at 2,500 sales per month in total, they need to be spread out evenly across all the listings rather than being concentrated on just one or two top listings. This is because it makes it easier for you to generate more sales through all the listings instead of competing with the top listings – something that is going to be quite difficult initially.
- You will also have to make sure to verify the data you have gathered. You want to be sure that the numbers you have generated are not a one-shot scenario. Ultimately, the product that you want to sell on Amazon must be able to generate consistent sales. So, the best way to test the consistency of the product is by repeating the aforementioned steps for at least 1-2 weeks. You have to gather the data every day for all the 10 listings and figure out the total average monthly sales on each. If this average doesn’t vary considerably for a couple of weeks, then you are good to go.
In addition to competitor analysis, you will also have to look into the seasonality aspect.
This is one key aspect of your product research that you simply cannot afford to ignore. For example, you may look at Christmas lights in December and wonder how great of an opportunity they present – they sell 5,000 units, after all! Who wouldn’t want to sell them?
However, this is likely to be the case only until the end of the month. That is, starting in January, it is highly unlikely for there to be any sales of Christmas lights. For this reason, it is imperative that before you jump in with a product, you research it thoroughly and identify if it is in demand throughout the year. One of the best ways to go about it is by using Google Trends. It is an excellent tool that can tell you the search volume for any keyword across any geography. Ideally, you should have some search volume throughout the year, rather than spikes only during a particular season. However, a bit of seasonality is still okay.
Related: How Much Could Your FBA Business Be Worth?
Expedite Your Research and Get Accurate Estimates
You can also make use of paid SellerApp tools to help you do the job faster. While you don’t necessarily require this tool, it will definitely make your job easier and provide you with real-time, accurate estimated sales. Instead of manually doing the research for each product, all you have to do is copy the URL of the listing and add it to the product tracker. The best part is that you can view the sales data for up to 30 days to further ensure the validity of your product research.
Before we proceed any further, we would like to point out that product research is a time-consuming, difficult process. If it were that easy, then everyone would be doing it. It is absolutely correct to assume that product research involves a lot of trial and error and at times, it can be highly frustrating. However, it is crucial that you find the right product in this step – doing so will only make your job easier down the road. It is better to spend hours in this step and find the right product, rather than picking an average product and then trying to sell it on Amazon.
Step 2: Source the Product
After you have finalized your product, the next step is to procure it from a reliable supplier. Now, there is no hard and fast rule when it comes to selecting a supplier, as long as you ask them the following questions:
- Do you have a minimum order?
- Do you offer samples?
- Do you have a discount for ordering more volume?
- How much time will it take for you to deliver the order?
- What can I expect to pay in total?
- When do I take the ownership of the product?
These are some of the few questions that you need to ask when you approach a potential supplier. However, along with these, you should also remember to ask your suppliers about their full product line. This is because, at times, we get so caught up with only one product that we may miss out on other exciting offerings. Therefore, just browse through their portfolio quickly and see if there is anything interesting that you may want a quote for in the future.
Some of the most popular sourcing portals are Alibaba, AliExpress, and Global sources. Alternately, you can also look at your local/regional suppliers to find the best rates.
Negotiation is a delicate art and as such, it should be done carefully.
You should also be sure to discuss the payment terms in great detail. At the end of the day, you should arrive at terms that are suitable for both parties. Depending on where you are and your worthiness, some suppliers may offer credit terms of up to 60 days. Others may choose to take a partial payment upfront with the remaining sum to be paid after the delivery. Whatever may be the case, always remember to run the numbers carefully and cross-check the same so that you know what you can expect to pay.
As and when you receive a response from the suppliers, make a note of it and observe their replies. Did they answer all your questions or did they just give you a generic response? How were their communication skills? Since you are ideally looking to pick a supplier for the long term, you want to do business with someone who is polite, understanding, and on the same wavelength as you. Believe it or not, these little things matter a lot when it comes to doing business.
You also want to get a couple of samples from each supplier to check the quality and figure out which one you like the best.
Make sure to get quotations from 10-15 suppliers to see how much on average you need to pay to source your product. This will also give you a good idea of how the industry is performing and help you make some new connections.
Step 3: Create the Listing
Congratulations, you have successfully sourced your products and now, you’re a step closer to start selling your goods through Amazon FBA! In order to ensure that we cover all the important aspects, we will approach this step systematically. So, here is how we do it.
First Up, Create Your Amazon Seller Central Account
Well, just like any other online platform, you can’t do much on Amazon unless you create an account on it. As a seller, you will have to create your Seller Central account – this is the account through which you will control, manage, and track everything – inventory, sales, reviews, advertising, and all the other important business metrics you can think of.
There are two options here.
- Professional account – $39.99 per month
- Individual account – per unit sold
You can either opt for a professional plan that costs $39.99 a month or you can go for an individual account that doesn’t have any fee although, you will have to pay $1 for every sale you make. In most cases, the professional plan makes for a far superior choice, especially if you are serious about doing business on Amazon. This plan is well-suited for those people who plan to sell more than 40 products a month.
All you have to do now is visit the ‘account creation’ link and follow the prompts. This is where you will be asked to enter all the basic information such as store name, credit card details, bank account information, et cetera. To make things convenient, make sure that you have all these details in hand before you get started! Once you have set up your Seller Central account, you will then have to create your listing.
Now, It’s Time to Create the Product Listing
This is the part where you will have to work hard and put in quite a bit of effort. The idea here is to create a high-quality listing that prompts the person on the other end of the screen to purchase your products. We understand that it sounds quite daunting, to begin with, but if done correctly, it can help your sales tremendously.
On your Seller Central account dashboard, head to the catalog section and add products so that you can create your first listings. In this section, you have the option of searching for your product name and finding listings that already exist. However, you must remember not to do so. Instead, focus on creating a new listing for your product from scratch.
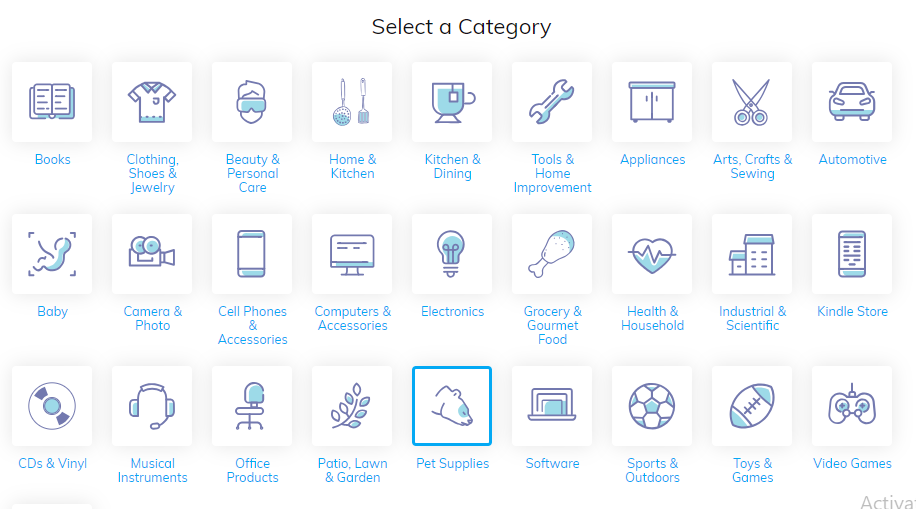
Simply find the most relevant category for your product. Once you have found it, hit select and fill in all the basic information about your products. You will also be asked to enter a brand name here and we, at SellerApp, recommend you use something that is universal. By using a broader name, you ensure that you are not restricted to just one niche and in the future, you can always sell multiple products across different categories.
UPC and FN SKU Barcodes
In the same step, you will also have to enter your product ID – without this, you cannot create a listing. The most common product ID is a UPC barcode. You will have to buy one of these and the best way to go about it is through GS1.
After you have entered your UPC barcode details into the system, click on ‘Save and Finish’ so that you can access your products’ FN SKU barcode. Don’t worry if you haven’t entered other information – we will get back to it later. For the time being, let us focus on dealing with the barcodes.
After your listing has been created, you will need to go to the inventory section and click on ‘Print Label Items.’ This step will generate the FN SKU barcode for your product – this is the barcode that needs to be displayed on the packaging of your product.
Therefore, you will have to send this FN SKU barcode to your supplier so that they can stick it onto the packaging of each item. If you have chosen the option of customized packaging, then you will need to send it to the party responsible for it. In either case, the FN SKU barcode needs to be stuck on your product. DO NOT FORGET THIS!
Alternately, you can also have Amazon do this part on your behalf, but you will be charged a nominal fee per unit.
Keyword Research
As you may recall, we spoke about keyword research earlier in this guide. The reason why we are discussing this again is that it will help you prepare your listing copy.
The idea here is quite simple – you take your main keyword and try to come up with its variations. This will ensure that you target all the relevant keywords with high search volume. Furthermore, it will also help you discover new keywords and thus open up a whole new range of opportunities for you to target.
The best way to go about this is by using the SellerApp Amazon keyword research tool. This will show you all the possible variations of your main keyword with the search volume. It will give you an idea of what people are searching for and, in turn, help you target those keywords for better conversions. Of course, this doesn’t work if your product is entirely different from the keyword you are targeting! Additionally, you can also use keywords from your competitors. By combining keywords from both the results, you will be in a much better position to write an effective product listing copy.
Recommended: Free Tool For Amazon Keyword Tracking & Indexing

Photography and Listing Copy
When it comes to Amazon product photography, there are two ways to go about it – you can either hire a photographer or do it yourself.
In the first case, you get a more professional outcome. You can be certain that the images delivered to you are of high quality. However, you will have to pay the photographer that will, once again, add to your initial investment costs. Depending on what the financials of your company look like at the time, you may choose to go with this step.
It is more than possible to find photographers online who specialize in product photography. Make sure to discuss the terms, prices, and delivery times before you get started.
Alternately, there is nothing wrong with using a smartphone to take pictures of your products. However, there are a few things that you should keep in mind if you choose this step:
- The image needs to be taken against a white backdrop – the product should take at least 85% of the entire picture.
- There should be no logos, props, or texts on the image.
- Take the picture of your product from multiple angles. You can also consider adding pictures here that show your items being used by different people.
- Once you have the packaging ready, you can add the photo of your product with its packaging.
Coming to the listing copy, you will definitely want to take your time with this step. It is because this is what is going to sell your products. People are going to buy your items based on how well you describe them. It is like making a sales pitch online and obviously, you don’t want to go wrong here. Additionally, you should also include your main keywords wherever possible – this will help your listings get a higher rank in Amazon’s search results. This step is from an SEO perspective and is equally important.
So, you will be writing a detailed title which will be followed by bullet points and a description. Once again, remember to use the keywords but don’t overdo it – it may de-rank your listings. Keep it natural, easy to understand, and engaging. Put yourself in the customer’s perspective and imagine what you would like to read. You can also analyze your competition and see how they are doing it. This is another great way to get an idea of how to write an effective listing copy for your niche.
Packaging Design
Using customized packaging is one of the best ways to set your product apart from the competition. It gives your product a unique touch and also creates brand awareness in the market.
Ideally, here is the information that you want to display on the packaging of your product – brand name, product name, the image of the product, country of manufacturing, brand logo, et cetera. Depending on the type of product you have, you may also be legally required to display additional information.
You can ask your supplier for product packaging options. They will provide you with different templates and all you have to do is find the one that you like the best. Coming to the design part of it, you can use online freelance sites to find designers who are experienced with Amazon product packaging.
Once you have finalized the design, you may be required to place a large order – be sure to discuss this with your supplier beforehand. Also, you will want to get this done as soon as possible, given that it is going to take your supplier a good couple of weeks to deliver on this order.
Step 4: Figure out your Delivery Plan
You are now a step closer to launching your product on Amazon. To do this successfully, you will first have to get your products shipped from the supplier to Amazon’s warehouses. Then, provided you have chosen the Fulfillment by Amazon delivery option, you can let Amazon take care of the rest.
Recommended Seller Guide For Amazon Product Packaging
Shipping Options
If your manufacturer/supplier is based in the same country as you, then it wouldn’t be that big of a hassle to get your products shipped to Amazon. You can either have the supplier organize the shipping plan or find your own delivery partner to do the same. Whatever may be the case, make sure that you understand all the terms and conditions before going ahead with the shipping plan.
On the other hand, if you are getting your product’s shipping from a foreign country, say from China, or India to the US, then you will have to be more careful. With international waters involved, there may be issues with customs or something along those lines. Therefore, you will want to be prepared for them as they come along.
Even in this scenario, you can either have your supplier use their own freight forwarders or you can find one yourself.
In the first case, the process is quite simple. You just have to discuss the terms with your suppliers and they will give you a quote. Make the payment and your products will be shipped directly to Amazon. Furthermore, in many cases, using your supplier’s delivery partners will turn out to be cheaper than using your own.
fbaRelated Read:12 things you must know before your first Chinese sourcing
However, there are a couple of drawbacks to getting your products shipped this way. First up, you have little control over your shipment. In case anything goes wrong, you will have to deal with the customs authority and the supplier, and try to gap the bridge between the two. At times, this can be quite frustrating.
You can easily avoid these issues by choosing your own freight forwarder. This will not only give you more control over your shipment, but you will also have a direct line of contact with your shipping partner in case any issues arise. It is important to use a freight forwarder that you are comfortable with – someone who explains the entire process clearly so that you can rest assured of how your products are reaching from the source to Amazon’s warehouse. Of course, this may set you back more in terms of expenditure, but it is definitely a price worth paying.
Seller Central Shipment Creation
You will have to create a shipping plan to ensure the smooth delivery of your products from your supplier to Amazon. This can be done in the ‘Manage Inventory’ section.
Some information here that you will be asked to provide here are as follows:
- Ship From – This is the address of your supplier, provided you are using them to deliver your products. In case you are using your own freight forwarder, then you will have to put their address instead.
- Case-Packed Products vs. Individual Products – If you are shipping only one type of product, then you will want to select the case-packed product option. However, if you are sending different products in the same box, then you will have to go for individual products.
- Number of Units – You will also be asked to enter the number of units that you are going to send to Amazon. While the number of cases and the number of units per case may not be that exact, you will have to ensure that the total number of units is correct.
- In case the product falls under a restricted category, then you will have to provide additional information.
- Shipping Charges – Depending on the carrier, the dimensions and the weight of your boxes, you will have to pay a shipping charge. If you have selected your own carrier, then you can skip this option. The last step now is to print the box labels and send them to your freight forwarder of the supplier.
A-Pro Tip – Get your Products Checked
Whether you are sourcing your products from Asia or locally, it is always a good idea to get your products inspected by a third party, before they leave the factory. This is because once they reach your home (or the FBA warehouse), there is not a lot that you can do if the quality of the product is not up to the mark.
There are several notable third-party inspection companies that specialize in this very task.
Step 5: Launch Your Product
You have created your product listing and taken care of shipping. Congratulations! Now all you need to do is launch your product on the Amazon Marketplace and you are good to go!
To get started, you need sales and reviews – period. Without this, you are not going to get anywhere.
In order to get sales, you have to make sure that your listing appears on the results page when customers type the name of your product in the search box. This can be done by making sure that your listing is optimized with the correct keywords. Do you remember the part about us talking about the importance of listing copy and keyword research?
Well, the reason for that is right here – a brand-new product like yours will appear on page 20 or even beyond that. It makes it virtually impossible for your listings to be seen by the customers. Therefore, to ensure that your products have some chance of getting visibility on the site, you need to have the appropriate keywords.
Now here is a golden rule that will benefit you for the rest of your journey on Amazon – to move up in the rankings and reach the first page, you will need sales. To get sales initially, you will need positive reviews. After all, customers are more inclined to buy from listings that have glowing reviews from other buyers. Now, let us break this down further.
How to Get Sales on Amazon?
Part 1: Promotions
One of the best strategies to get sales after you have just launched your product is by creating promotional campaigns. This is a brilliant way to create some hype in the market about your product and attract some potential customers.
For instance, initially, you can give a higher discount of up to 50% and more on your products. This will drive in a lot of sales that will, in turn, help you get some reviews. Yes, this will impact your margins at the beginning, but it is well worth it. Your sales history will improve and consequently, your rankings will go up. This will also help your products get ranked for certain keywords.
A good trick here would be to keep your promotional sales at a fixed number every day. In other words, only a fixed number of people can get a discount on your product every day. This will ensure that your margins don’t suffer heavily. To find this magic number, all you have to do is type in the name of your product and see the listings on the first page.
Then, use our tool to figure out their daily and monthly average sales. If your top competitor is selling 10 units a day on average, then you should aim to give discounts on 10 units a day. The ideal timeframe to run this promotional campaign would be a couple of weeks, at least.
But since you are a new seller on Amazon your product listing is mostly placed > 10 pages, in other words, it has very low visibility, it is often hard for your potential audience to identify that you have a promotional offer running. Using other platforms like Facebook, Instagram, et cetera for promoting your product will build some instant visibility and brand awareness outside Amazon as well.
Now, the next step is to ask yourself this – How to Create a Promotion?
Well, the answer to this is quite simple – all of it can be done on your Seller Central Account. To do this, head to the Advertising section and click on Promotions. Over there, you then need to select the Manage Product Selection option.
This is where you will select how you want to identify your products. It can be based on SKU, ASIN, or any other means depending on your preference. Once you have figured out your selections, you need to create your promotions.
On the page, you will see that there are different kinds of promotional campaigns which you can create – there is free shipping, percentage off, buy one, get one, social media promo code, giveaway, and external benefits. Each of these options has its own way of going about which can be found by selecting them.
As a rule of thumb, you need to keep two things in mind – conditions, and scheduling. Conditions are where you set the criteria for the buyers that they must fulfill in order to be eligible for the discount. This entails the minimum quantity of items to be purchased and the minimum amount of sales. As for the scheduling part, this is where you enter the duration of your promotional campaign.
Additional Guide: An Expert’s Guide to Scheduling Ads on Amazon.
Part 2: Pay-Per-Click
Amazon PPC, also known as Sponsored Products campaign, is another way to boost your visibility and sales on the Amazon Marketplace. Simply put, it is an advertising strategy that will allow you to display an ad for your product within the search results, every-time a customer searches for the related keywords. The more you pay for the ad, the better placement it will get in the search results.
There are two types of campaigns – automatic and manual.
In the first case, Amazon does all the work for you. It will browse through your listings, come up with relevant keywords and target your ads to all the relevant shoppers. This campaign should be your starting point in the world of Amazon PPC.
Reference
| Automatic Campaigns | Manual Campaign |
|---|---|
| Amazon Chooses the products and keyword based on the product relevancy | Seller has the power to choose the keywords and product targets |
| Gives insights into customer searches | Ability to choose the audience that could convert the best |
| Lesser control on the ad target and bidding | More control the ad groups, match types and the keywords |
Automatic campaigns will collect all the data for you. After running them for a week or two, you can download the keywords report that will have all the keywords for which Amazon has displayed your ads. From this, you will be able to find out which keywords have performed really well, that is, have managed to bring in good traffic and good conversions. It will also tell you which keywords are not performing well and consequently, those are the ones that you should avoid spending your money on.
Once you have identified the top-performing keywords, put them in a manual campaign and get it started. In this case, you will have more control over how your ads run. In other words, your ads will be displayed for the keywords that you have selected. Therefore, you can make a particular bid for each keyword and watch the magic happen.
When it comes to PPC, keep in mind that it is an iterative process. It requires constant review and optimization for the best results. You need to keep identifying new keywords from the automatic campaign and implement the same across your manual campaigns. You also have to monitor their performance regularly to ensure that you are not wasting your money on keywords that are not bringing you any conversions.
- Build an efficient PPC Campaign
- Cut down Negative Keyword increasing ACoS
- Improve Targeting with Match Types
- Leverage Top Keywords for profitable ad-spends
- Narrow down the best product targets for ads
- Increase Bids for the Top Performers
We have prepared a thorough guide here for Amazon PPC. This exhaustive guide will give you all the information you need on how to successfully run a Sponsored Ads campaign on the Amazon Marketplace.
Last, but not least, you need to keep a track of your budget for marketing. Before you get started with promotions and pay-per-click, you must allocate a certain budget and make sure that you stick to it. These campaigns will cost you money, and it is likely that they will not fetch you any profits initially.
In the long-term, however, your sales history will improve and therefore, your products will start to rank higher. You will also get a lot of reviews in the process. Eventually, a time will come when people will find your product naturally by searching for it on Amazon, instead of you having to pay for an ad.
Recommended Tool For Amazon Pay Per Click
Final Thoughts – Analyze, Optimize and Repeat!
Well, we have pretty much covered everything you need to know in order to start selling on Amazon. For information, we suggest that you check out our SellerApp Blog Section which has comprehensive articles on different aspects of selling on Amazon. You will also find many advanced strategies in these sections but for the time being, this is good enough for you to get started. All the best!
Additional Resources:
- Ultimate Guide For What to Sell On Amazon
- Top Selling Items & Categories On Amazon
- Amazon PPC Guide
- Amazon Attribution For Better Conversions.
- Top 3 FBA Errors and How to Get Your Money Back
- Amazon FBA New Selection Program
- Frequently Asked Questions – Amazon FBA Prep







AmDumn
February 6, 2019Well explained!
zovre lioptor
May 10, 2021Very informative blog.
Bookmarked your website.
Thank you SellerApp
Arishekar N
August 2, 2021Very glad to know.